Thursday, January 16, 2014

BELLAMI Hair Extension Review


Okay, I am doing this long and overdue post on my extensions! I hope I answer all your questions and you find this helpful in deciding if you want to buy a set or not! ;)

Let me start by telling you a little bit about of my hair extension history. My hair is really thin, and throughout the years with all the dying and cutting it hasn't gotten any better. Not to mention that my hair likes to take it's time to grow. So extensions are life savers and big confidence boosters! I have used extensions since I was 15 years old. Tried all kinds of extensions, from crazy expensive hair that lasted  less than a month to amazing deals on eBay that in my opinion were GREAT hair. I have cut, dyed, and done the unWEAVEable. For a year I even had individual extensions put in (WILL NEVER DO THAT AGAIN.) Don't get me wrong, they were super convenient and for lazy people like myself individual extensions are perfection. BUT they really damaged my hair and I lost even more when I removed them. My head couldn't afford thinning of any kind. That is why I stick to my true and tried clip-in hair extensions!! 

Like I mentioned before, I have really thin hair. So when it comes to hair extensions, I need something that is going to one, blend naturally with the rest of my hair. Two, have secure clips that will get a good grip on my hair without thinning it out and three, give me length plus volume all in one.  Is that too much to ask for?? I  think not. 

I found out about Bellami's through YouTube and before I bought them I did my research. I was craving them for about 6-8 months. I would weekly search for reviews on YouTube, stalked their IG page and would find myself on their page admiring before and after pictures. Crazy right? I wanted to be sure that my little dollars would get their worth.  I have had issues before with other companies that show you this amazing hair online and when you receive it, it's well... a piece of blah! 


After months of research I finally did it, I ordered them! Let me tell you I have never received a package so quick! I ordered them on a Monday afternoon, by Wednesday my babies were in my hand! Bonus points for that Bellami! (I am sure the shipping will vary depending on your location.)

So here is the break down on what I got and what I paid:
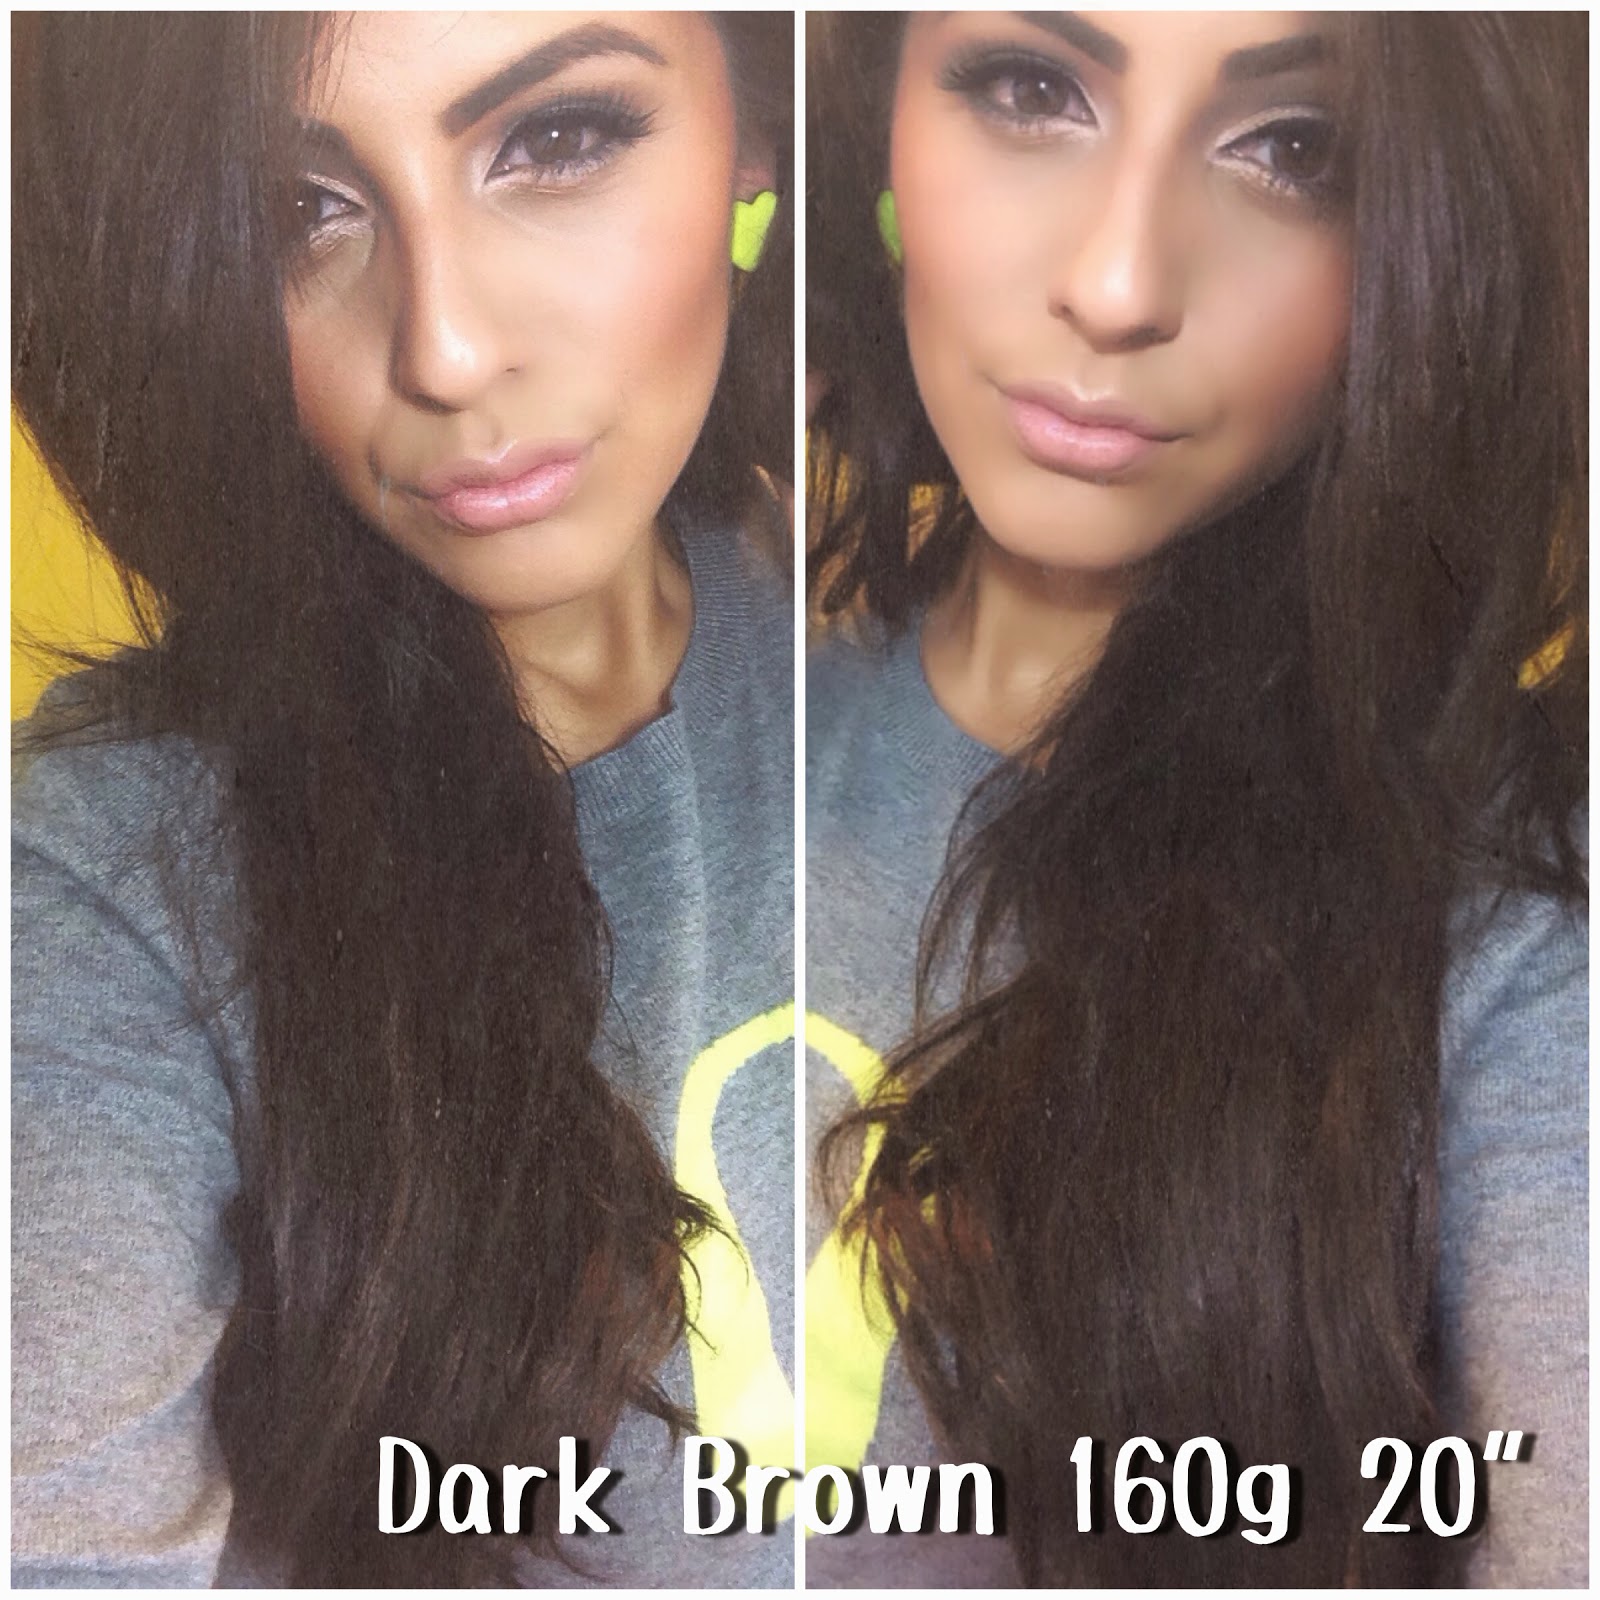
I ordered the Bellami Bambina 160G 20" set in Dark Brown 
  • (1) 8" weft
  • (1) 7" weft
  • (2) 6" weft
  • (2) 4" weft 
  • (4) 1.2" weft   
 Total of 10 pieces. 

I paid about $160 for mine. I have paid different ranges of prices for hair extensions, and this may seem like a lot but its average for GOOD hair extensions. Remember you get what you pay for!

OK.....so here are my thoughts on them-

It was LOVE at first sight! (HUGE SIGH!!!) Like can I get an amen for nice, silky, smooth hair! I was ecstatic when I opened my package. They were so BEAUTIFUL! Thick from top to bottom, they fit my hair color perfectly and the clips were exactly what I was looking for. I clipped those bad boys on minutes after opening the package. They blended so beautifully!

Why I love my Bellami's:
  • They are 100% Remy Human Hair (make it so they blend nicely, you can wash, dye, blow dry, curl, etc)
  •  The wefts are sturdy so you don't have to tease your hair to keep them secure
  • The silicon strip prevents hair from damaging. 
  • DOUBLE DRAWN (making your extensions thick and voluminous from top to bottom)
  • After having them for 6 months they are still in great condition. 
  • They live up to all their hype! 
How I Care for them:
  • Wash them MAYBE once a month (if that) They are extensions so they don't produce all the oils your real hair does. There is no need to over wash them. You'll dry them out. 
  • Use my usual Shampoo/Conditioner
  •  Let them air dry
  • Will occasionally spray them with heat protector
  •  Try not to let hair spray touch them 
  • Easy as 1, 2, 3!
 

 I purchased another set for volume and body purposes only. So, I cut these (chocolate brown Bambina 160g) to about 16-17" and dyed them ombré.  NOW, unless you trust yourself 100% to do this kind of work on your extensions, I suggest taking them to a professional! 

After dying them, there was a bit of fall out, the ends did dry a little, but I nothing more or less than I was expecting.   :)


I curl, straighten, curl again, and my Bellami's still look great! I will absolutely continue to purchase them as long as they continue to provide AMAZING hair. If you are questioning buying a set don't question it anymore..DO IT. You'll never regret it. After all, what girl doesn't love long voluminous locks of hair, come on!  


FOLLOW ME ON INSTAGRAM TO SEE DAILY PICTURES OF MY BELLAMI'S 
xo,
Carina
 
Watch my review! 


Wednesday, December 4, 2013

Highlight and Contour made easy!

Hello Beautifuls!

I always get asked about my contouring and highlighting tricks. To be honest, everything I know is from watching some of my favorite YouTube beauty gurus! They are my go to when I need help with any makeup tricks. Today I just want to share the routine I have  developed from bits and pieces of different tutorials. I hope this helps and please don't hesitate to ask questions.


Most of the products I use are drugstore brands and very affordable! Pheww!! I know money gets tight during the holidays, so PLEASE don't feel like you have to go out and splurge on make-up. (Even though I wouldn't stop or blame you if you went a little make up crazy)

**If you would like to see a blog about my favorite drugstore products please let me know. I would love to share with you all my holy grails! ;)

Also, I did a video on how I highlight/contour, check it out for more tips!
My YouTube Channel!
(if you have trouble seeing it,  please give it a few minutes)

Here are the products I like to use:


 I don't ALWAYS do this, but when I am going out and feel like doing the extra steps here is where I place my highlight and contour:

I focus the highlight on the center of my face or areas I want to brighten. 

Recently, I purchased the Maybelline FIT ME foundation stick and it has been my BEST FRIEND! For beginners, I suggested investing in this product! It will make your life so much easier.

 I like to focus the contour on my forehead, I apply this and with a small brush push the product "downward" to make my forehead appear "smaller", then I also apply on the  hallows of my cheeks and push the product up. Personally, I feel that by pushing the product in an upward motion helps "lift" your cheekbones. Lastly, I apply on my nose and jawline. 

Ladies,  you can never blend TOO much! When using cream/liquid products to highlight and contour you want to make sure you are constantly blending. This will help your make up look more natural and avoid harsh lines.  (Nobody likes those)

When I am doing a full face of make-up I like to use a lighter foundations for start of with. This will make your canvas easier to work on and again make you face and make up look more natural.

If you are doing this for the first time, make sure to PRACTICE PRACTICE PRACTICE. I promise with time it will be easier and you find tricks that work for you. (If you do, please share!)

Lastly, I like to set everything with powder. I've been loving this Rimmel Natural Bronzer. I also use this for my every day make up. It's a beautiful subtle bronzer for all skin types. For highlight I use the Hard Candy Tiki Bronzer- the picture doesn't do it justice. It's AMAZING!!!! It blends very well and I think looks beautiful on all skin types/colors. 

My brushes are mainly from Sonia Kashuk. I am obsessed with her brushes. You can purchase these online or Target! Score! ;) They are super cheap and great quality!


I hope this helps and if you decide to try this out, please show me pictures! Tag me #CCMAKEUP

xoxox,
C


Tuesday, November 26, 2013

Aspiring to Inspire!

I've spend the last three months trying to figure what I wanted to write about, share, and expose in starting this blog. The lack of knowledge about starting up a blog is what kept me from doing actually starting a blog. How would I even begin?  What would people say? Would anyone even care what my thoughts were? These are the questions I often asked myself. So many times I found myself on Blogger, cup of Joe ready, music playing and ZIP...NADA. No words to write. It got very discouraging at times, so discouraging that I called it quits. I read a quote on Pinterest one day and it went a little something like this "Your life is a message to the world, make sure it's inspiring" At first this meant absolutely nothing to me, just another quote I came across. Then as I was on my way home from work it hit me. What I do today, tomorrow, in my life IS a message to the world. Whether we like it or not our actions are what we leave behind. What did I want to leave behind? What did I want people to remember me by? 

I don't have any special talents, and I am by no means a professional at what I do, but I enjoy sharing my thoughts on beauty, life, fashion, being a WOMAN and anything you could think of to whoever takes the time to read, view or listen.


My hopes in starting this blog, are to inspire YOU to be the best YOU can be. To share with you beauty tips that have worked for me and hopefully will work for YOU. To express a sense of creativity whenever I have sudden creative outburst (which is more often than not). To empower women and have a place that makes you feel more beautiful than you already are. A place to find comfort, confidence and companion. A place to share my thoughts, ideas, and a place to gossip on the goods. No one is left out, no one to bring you down. Just a place to INSPIRE!


Here's to a new journey! I hope we all enjoy the ride!!

XOXO
 C